Looking for ways to save energy at home? Try insulating your hot water heater. This is an inexpensive project—the investment in parts will generally pay for itself in one year—and can be done in just a few hours.

Heating water is the second highest use of energy in the home. Insulating the tank could save you seven to 16 percent each year in water heating costs, plus you’ll be helping to keep our air clean. Even if your water heater is in a heated part of your home, energy loss through the walls of the tank can be significant.
Before you start, check with your local utility provider as they may provide you with free tank insulation or a rebate. Some utilities will even install water tank insulation at low or no cost. Keep reading to learn more.
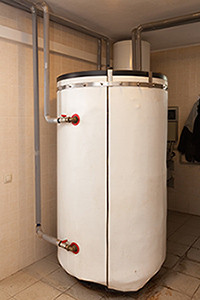
If your hot water tank is new, it is likely already insulated. If you have an older hot water tank, check to see if it has insulation with an R-Value of at least 24. R-Value is a measure of insulation’s ability to resist heat traveling through it. The higher the R-Value, the better the thermal performance of the insulation. If you don’t know the tank’s R-Value, feel it. A tank that is warm to the touch needs additional insulation.
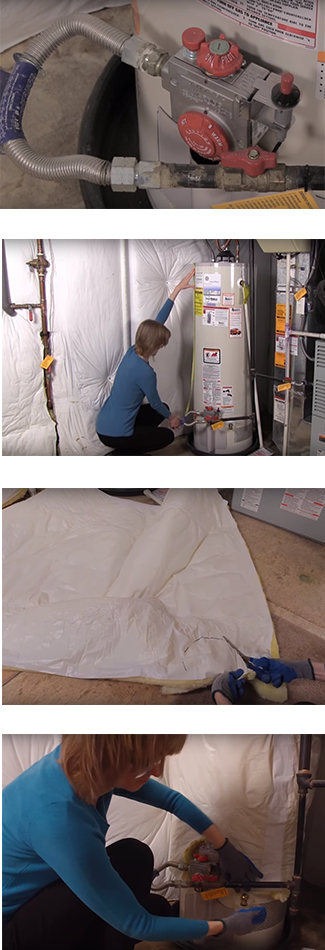
For step-by-step instructions on how to insulate your hot water tank, check out this brief video or keep reading below.
1) Turn off the water heater.
For electric water heaters, turn off the breaker at the electric panel. For gas water heaters, turn the gas valve to the “Pilot” position.
2) Measure the height of the water heater and cut the blanket to fit if necessary.
Leave the top of the water heater open—it is important not to block the vent on top of a gas unit.
3) Wrap the blanket around the water heater and temporarily tape it in place.
For ease of installation, position the blanket so that the ends do not come together over the access panels on the side of the tank. Some tanks have only one access panel.
4) Using a marker, mark the areas where the controls are so that you can cut them out.
For electric water heater units, there will be two panels on the side of the tank. For gas, you'll need to mark an arch-shaped hole around the gas valves and burner. Be sure to leave plenty of room around the valve and burner areas (the opening should be at least one inch wider than the valve and burner area). Also, mark the area where the pressure relief valve and pipe are. This will be a pipe that sticks out of the side of the water heater.
5) Install the blanket.
Be careful to line up the cut-out areas and then tape it in permanently in place.
6) Turn the water heater back on.
Don't set the thermostat above 130 degrees Fahrenheit on an electric water heater with an insulating jacket or blanket—the wiring may overheat. Also, remember that you can save even more energy by setting your water heater thermostat at 120 degrees or lower.
Note: For an electric water heater, you might consider insulating underneath the tank as well. A ridged piece of insulation (or bottom board) will help prevent heat loss into the floor, and could save you another four to nine percent in water heating energy. This is best done when first installing a new water heater.
Looking for more DIY projects? Learn how to build a rain barrel in just a few hours. Also, check out more tips to save energy and keep the air clean.